Labels

beekeeping (2) garden (15) recipes (1)
Showing posts with label garden. Show all posts

Sunday, November 13, 2011

Dahlias - A Labor of Love


Pyrimid-cartoon4.gif


When I was a kid I thought it would be cool to be an archaeologist. I imagined myself crouched over dinosaur bones and priceless artifacts, brushing away dirt and sand to slowly reveal clues from the past....what was I thinking? That sounds awful!

Sure, it might be fun for a few minutes but after that your back starts hurting you just want to get a shovel and get things moving. I say that because you have to be part archaeologist to successfully grow dahlias.


The greatest thing about dahlias, other than their beauty, is that they multiply every year. Maybe they don't produce a lovely scent like some pretty flowers but at least they're not lazy! I know that daylillies, daffodils and other flowers multiply but they don't have anything on dahlias.


These are all from my garden this and last year. I am obsessed with growing dahlias. SADLY- I made mistakes last year by thinking we were in a warm enough area that the tubers could overwinter in the ground. MISTAKE. They all turned to mush and I had to buy new in the spring. Waste of money and gorgeous flowers. 


When you order dahlia tubers you pick by staring at hundreds of amazing flowers and then you get this in the mail-


These are dahlia tubers packed in sphagnum moss.

plant_depth.JPG.jpg


To plant the tuber you dig a 6in deep 1 foot diameter hole and place the tuber at the bottom. If it's a tall plant it'll need to be staked or provided with support of some kind. Then you fill the hole with good light dirt and wait for them to grow. My garden's natural dirt is nothing but heavy clay which is why I dig deeper and wider and fill in the difference with good light dirt.

At the end of the season, as soon as the first frost hits the dahlia plants will go from this-
To this overnight-
Then it's time to dig up and separate the tubers, a daunting job! Today I paid my dues and excavated all of mine. You may start with one horizontal tuber but they multiply like Mogwai and bloom into a bushel of tubers shooting in all directions. It's really amazing. 


This is about 10minutes in when I had to start working with my hands to avoid nicking the delicate tubers. 

I thought I'd dug a wide enough hole but the new tubers grew into the thick clay making the excavation even harder. This next photo is after another 10-15minutes of brushing away dirt-
If I had perfect dirt I could do what other people do and pry the entire thing out with a pitchfork but alas, the thick clay is like cement so no dice. Here's the final product after a total of 30 or so minutes and one or two broken tubers that didn't make it. 
The final step in the process is to divide them up and store them for winter. I need to do that tomorrow so for tonight they're still intact in their winter homes of sphagnum moss filled paper bags. I made the mistake of trying to store one survivor from last year in a plastic bag filled with sphagnum moss and it turned to mush. They need air and regulated moisture. They're very finicky so I guess they are a lot like having a Mogwai! 
Gizmo_the_Gremlin_Wallpaper_JxHy.jpg


I've already gotten my tubers mixed up during the process, shocking I know, so it'll be a surprise to see what blooms where after I plant them in the spring!

Friday, November 4, 2011

Hoop Houses!


The learning curve in gardening is pretty severe- I feel like I was in elementary school last year and now I'm taking the SAT's. My ONE hoop house last winter/spring season was a learning experience.


The hoops weren't high enough which meant that in the spring when it was even a little warm it would be blazing in the hoop house with not enough air circulating above the seedlings and plants. I scorched many a seedling.


This time around improvements were made- we went with a 6mm thick white plastic that's pretty rigid and resembles wrapping paper vs the flowing thin, clear plastic from last year.

We also lengthened the hoop tubing so it sits taller overall.

All materials were bought at Home Depot- our home away from home where I now have Rainman like abilities in that I can tell you what aisle to go to for just about anything.
The tubing is sold as a coil- we cut it with heavy duty tree pruning clippers. Here's a close up of the details: 

 
We hammer shim-like pieces of wood into the ground and force the tubing onto them.

Ms. Jo, the farm cat, approves of the new construction.


I'm covering 4 beds for the winter and keeping materials to start a 5th and 6th for spring seedlings. The winter hoops are protecting lettuces like Arugula, Leafy green, Romaine and other cold hardy things like Cilantro and Dill.
The bed above can be credited to my patented "Lazy Gardener" technique of letting the lettuce bolt and throw it's seeds all over so that the bed repopulates itself before fall. Lazy...and brilliant!

Most of the other beds have room in them so over the next few weeks I'm going to try and start a few things that do well in the cold like carrots and beets.

We'll see how it goes!

Saturday, October 1, 2011

Extreme Garden Makeover

This is not my garden, this is just my favorite garden picture. I love looking at it and imagining that it IS my garden where everything is perfect and orderly and all it took was one chick in a hat.  Last year I planted things directly into the ground with no border or raised beds. Some things did well but most were quickly overtaken by creeping grass and weeds. For example, here's a bean bed with weeds working their way in. 


In an effort to keep them at bay I tried putting down weed blocker which does work very well but weeds can start to grow even if a sliver of light gets through and then it sucks to try and pull them from between the slits. 


Just before the winter my lovely Louis built me these raised beds so that I could experiment with hoop houses. The farther bed was used for seedlings in early spring and the second I planted with garlic. These are 8x4ft rectangles made with pressure treated eco-friendly 2x12 planks from Home Depot.  The 12 in depth is ideal for root-heavy produce. 

The raised beds were so great to work with that I decided the whole garden should slowly get morphed into a raised bed garden- some things like corn, squash, watermelon, pumpkin and flowers excluded. SO  after buying a lot of lumber and meeting a handyman down the street who helped us, we went from this: 


To this:


To, finally, this:


Its heaven to me. I love working out there after a long day of staring at a computer like Dilbert. You can see the fountain I bought that's still not put together, it's just hanging out in the center of the garden waiting to be stacked and set up properly in it's stunning 5 tier state. My overall plan for the garden is to have flower beds in the middle with the fountain at the center of it all. Maybe next spring- there's not enough time to do it all! 

The boxes for the rest of the garden were made in 8x4 boxes but this time we used 2x6 planks....in hindsight, we should have stuck with 2x12 planks. We didn't realize how intense the sloping got in some areas, we had to dig down with a spade to level them which means that some ends of the boxes are almost level with the ground while the other end of the box is 4-5 inches above ground level.  over time I'll just add a plank level so it'll all work out but for now it's a lot of work to keep the grass from growing straight over some of them.

Those giant green things in the picture above are what lettuce looks like in late July after it's "bolted" and "gone to seed".  All that means is that they turn into giant dandelions - the lettuce gets super bitter and the plants send out fluffy seeds from the top.  This is what it looks like a month before-


Those little specs in the picture above are crushed eggshells to keep slugs away. One thing we have an abundance of is banana sized slugs- they won't crawl over anything sharp so eggshells are an easy way to keep them from taking over. 

The boxes have made things a lot easier but as you can see in between the egg shells, grass still finds a way in so I still have to pull it out pretty regularly. Putting straw down didn't really help but it was worth a shot. I do think that the straw helped with maintaining moisture levels. 


I've debated what it would take to put down pebbles to replace the grass walkways and it's an undertaking.  Especially because my garden plot isn't level- it slopes down gradually. You can kind of see it sloping in the picture above. Here's another favorite garden porn picture I like to stare at for pebble inspiration. 
From what I can tell, level is pretty important in the gravel ones so I'll stick with what I've got. Pebble looks pretty but the vibrant green of fresh cut grass is great too. 

As of an hour ago I finally finished canning all my excess tomatoes and bell peppers. They are now 22 jars of kick ass salsa and 5 jars of deeelicious pasta sauce. I'll share those recipes in my next post! 


Monday, September 19, 2011

I JUST NEED TO READ THIS G.D. BEE BOOK! ZZzzzzz

This is a post I wrote in Feb/March of 2011 and never posted- I titled it "I just need to read this GD Bee book" because I was cramming to learn everything about bees before starting hives in April. More updates to come! 

All good bloggers take 6 months off. That's the new rule. In my defense, I got sucked into a time warp of job interviews and the accompanying severe and extremely debilitating urge to do nothing before you're forced to do something for 8 hours a day.  I got a great job in August/September and managed to finish a few books and take many a hammock nap before my start date in October.  Here are the highlights from when I left off-


  •  We never put horses out back because we were made aware that those horses would come with an accompanying dog killing donkey named Taco, for real.  SO, we passed on that tempting offer and are leaving it for groundhog cover for a while. 
  •  ALLLLLL my dahlias started blooming at the same time, so this post will have random dahlia pics throughout. 


  • We started our 17month stint "fostercaring" for a cat named Jo - Ms. Josephine if you're dirty. It's a long story but she's adjusting well from apartment to farm life.  In the beginning, she wouldn't even leave the house and if she did, she'd creep along the ground. 
Then she started venturing a little further each day and exploring the area around the house. 
 And now she's climbing trees, rolling in dirt and even killing tiny garden snakes. She's gone native. 
  • The garden did well and kept producing bell peppers, tomatoes, swiss chard, brussel sprouts and okra until the first frost around Halloween. Here's one of my last harvest baskets- 
  • Hitching a ride is Walter Hardisty, one of the biggest flowers, dahlia pic! 

Sunday, August 29, 2010

Lil' Busy These Days


Sorry for the break in posts but it's been a jungle out there! I hunted a groundhog Caddyshack style (also to no avail), burned hundreds of caterpillars with a lighter (don't judge me, they had it coming) and would have maimed a rogue squirrel if my bb gun hadn't jammed (I suspect the squirrel jammed it). Yes squirrels are adorable but this one pushed me to the edge! I even forced Louis to do his homework in his car under a tree so he could stake-out the groundhog and squirrel. Nothing. They love to mess with me.

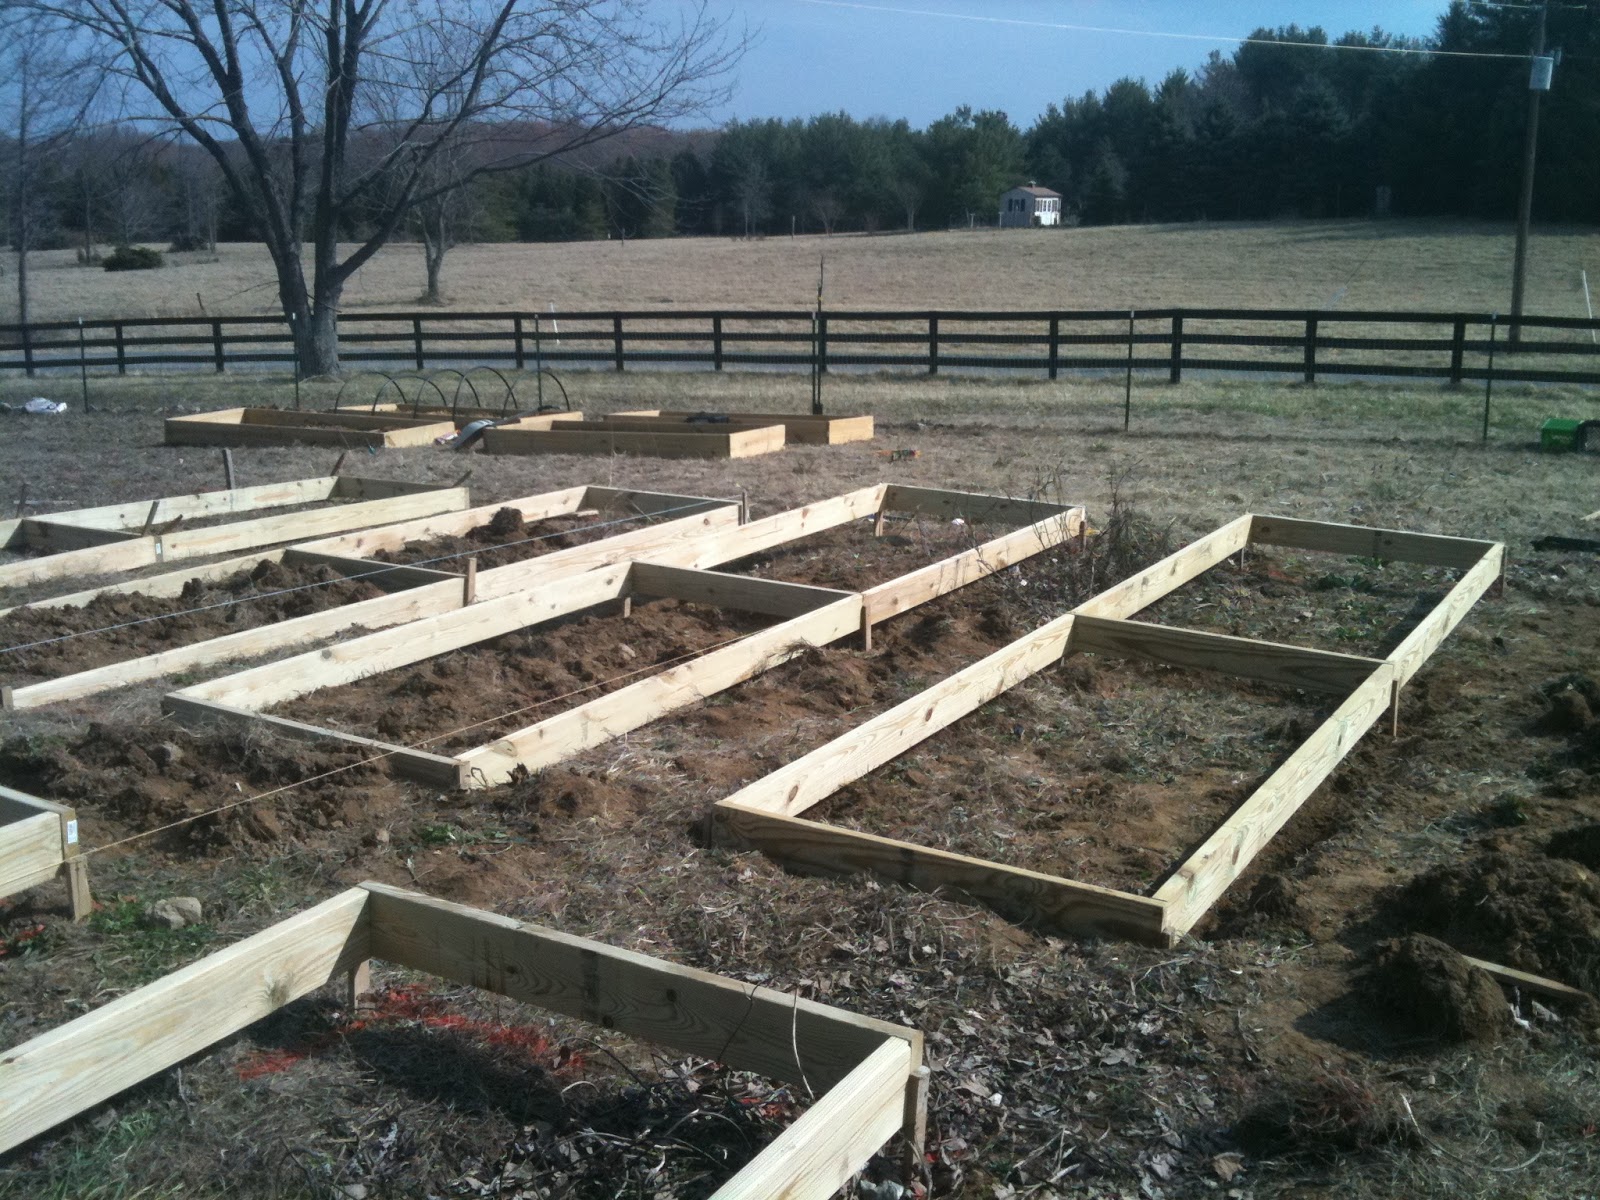
Despite the rodent's master plant to destroy the garden, it's been amazing. I didn't get to plant a lot of stuff I'd planned on but the corn, tomatoes, beans, eggplant, squash and melons have been awesome. the tomatoes are out of control.


Everyday for the past month and a half I've gone out there to find 3 or more cups of ripe cherry tomatoes plus huge heirlooms, romas, orange medium sized ones and smaller Early Girls.


I fill containers, my pockets, stuff them in my garden gloves and make a kangaroo pouch with my shirt to get them all inside. I end up feeling like Lucy at the chocolate factory. 
I've given a bunch to my nice neighbors but I think they're sick of them too, they didn't answer my call today to offer them more. I tried to control the desperation in my voice when I left a message. 


I've made gazpacho, tomato sandwiches, salsa (which was, to put it mildly, da bomb) and fancy grilled cheeses...a.k.a. grilled cheese with tomato. 

Gazpacho courtesy of a recipe by Alice Waters. We're tight like that/she posted it on Facebook. Tomorrow I'm going to invent a recipe for orange tomato and watermelon gazpacho.  I have a ton of orange tomatoes and the watermelon are starting to ripen. THAT I'd love to can for a summer memory during winter.  Alice's was traditional and delicious and is included below for you to try. Just FYI, I do not have a mortar and pestle. I winged it. 

Alice Water's Gazpacho Recipe:


Next up I made Grilled eggplant with my heirloom 'Mortgage Lifters'. It's just lightly fried eggplant topped with gruyere, my lemon basil and avocado. Lemon basil is my new obsession. I'm putting it on everything. 


I am generally not an eggplant fan but preparing it this way is insanely delicious. I watched a chef do it once. All you do is cut thin eggplant disks, I remove the skin, and fry them in a skillet until light brown with a little oil after coating them in simple eggwash and "spiced up" flour which is just garlic powder, pepper and salt in the flour.  :) The cheese melts on the hot eggplant and the cool tomato slice along with the avocado and basil is a mind blowing combo.

It'd be nice to can the masses of cherry tomatoes I have but it's a no go. Their small size makes dealing with the skin a losing battle. 

Here are some pictures of what I recently brought in. 


The fresh corn was delicious. The spaghetti squash are all growing and the beans just keep coming. Our favorite beans so far are 'Royal Burgundy'. They grow a vibrant purple and turn green when you boil them, letting you know when they're ready. They are by far the best green beans I've ever had. Next year I'm planting a ton. 
 
When I was planting watermelon this spring I mixed up the seedlings and lost track of what survived and what didn't and what I planted where. SO I knew the watermelons were going to be wild cards. When one was ready this week I cut it open to find this-


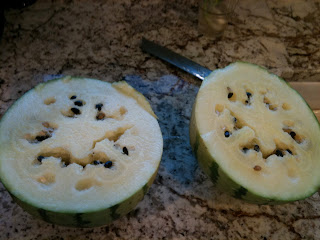
A 'White Wonder'! My good friend Erika loves this kind and told me they're $7 each for chemical-free ones at her McLean farmer's market...sooo, I'll be planting a lot of these next year too! It's super delicious and there's melon all the way to the green, no rind! I saved a bunch of the seeds. This is the melon I'm using for the watermelon gazpacho tomorrow. Some of the orange tomatoes are below.  


I forget what they're called but the orange ones are second only to the cherry tomatoes in production value. They just keep coming.  

The cantaloupe is also ripening up. This is from the 'Ambrosia' plant that's producing two right now and starting on a third. 


I had cantaloupe salsa earlier this year when Louis hired a chef to make us dinner in St. John. I'd never even thought of melon salsa, it blew my mind. I convinced him to give me the recipe and I'll be canning that too! Excuse the rind in the picture but I had to do a quality test!

The sunflowers are starting to bloom. I've never grown sunflowers so their height is still crazy to me. Some are two to three feet taller than me. It's like a forest!


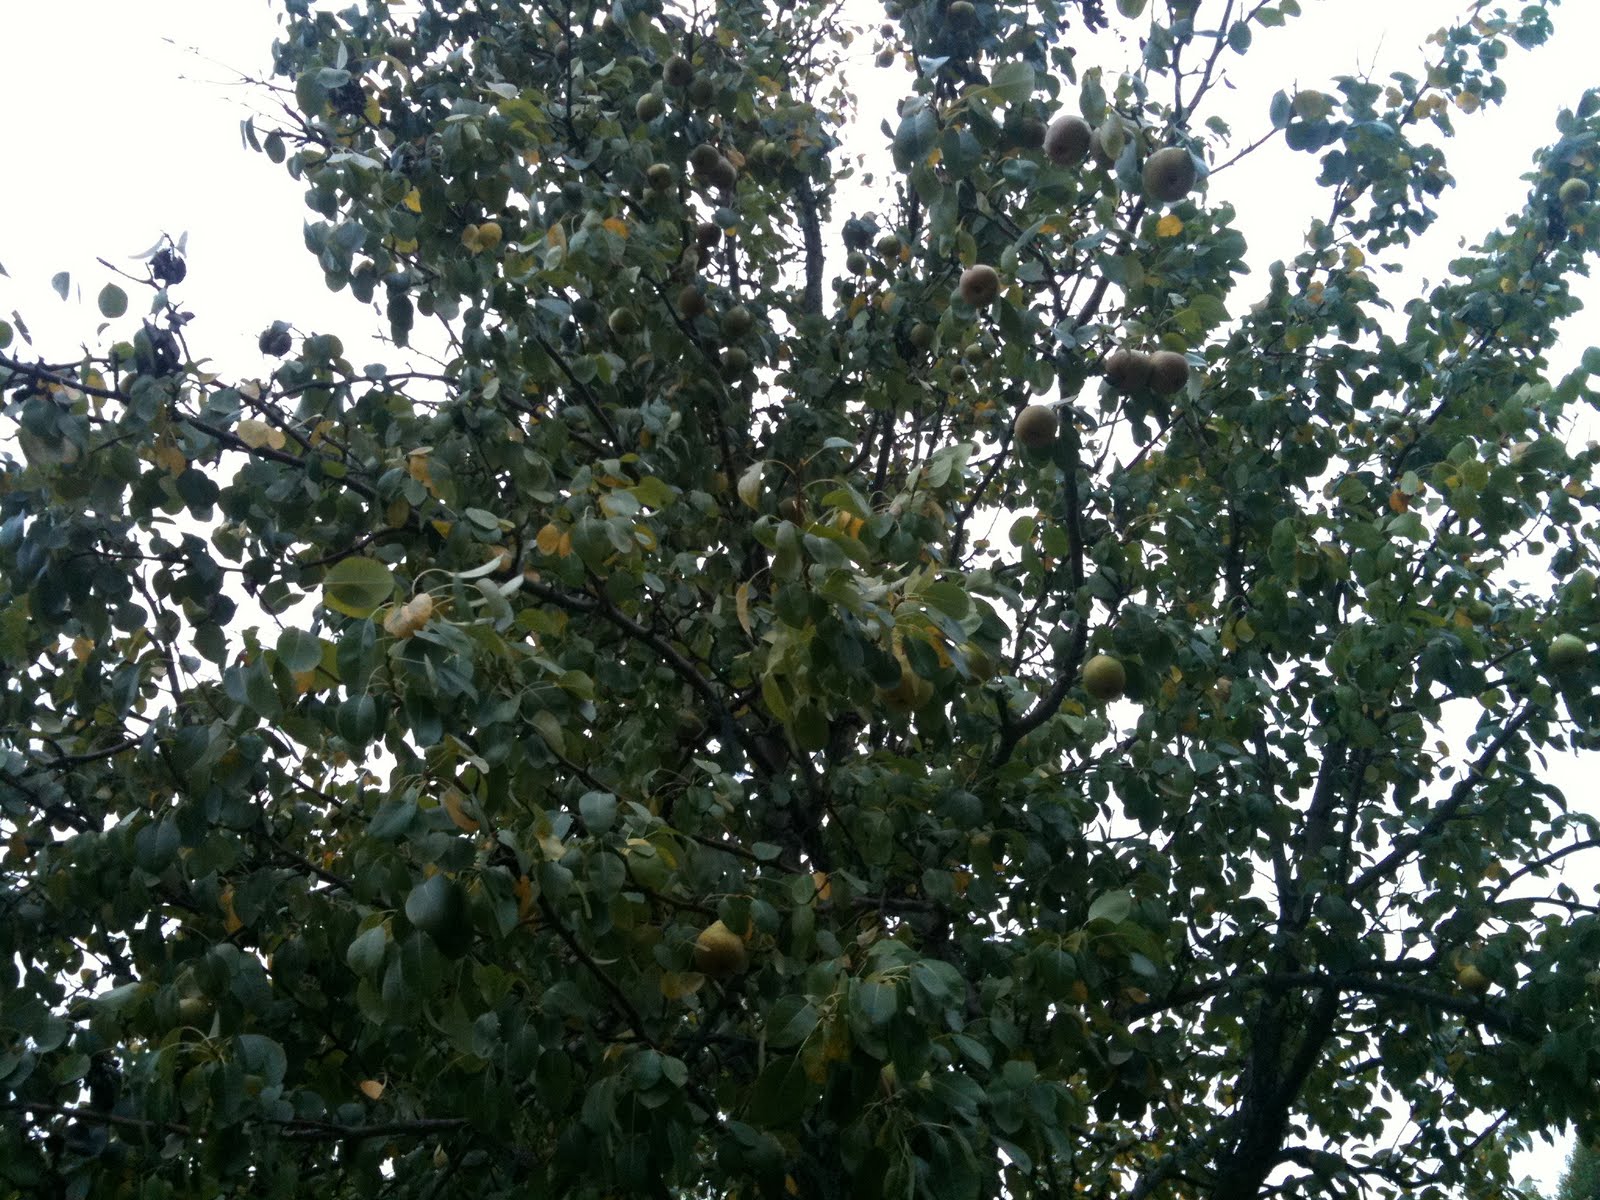
Two weeks ago the pear trees were FULL of pears. Hundreds of them as you can see in the picture below. 


I noticed they were starting to ripen before I left town for a good friend's wedding and when I got back, the trees were bare! The packs of crows, squirrels and deer had cleaned us out. AND all under Louis' nose apparently. There were only a few pears left at the very top so we got a ladder and grabbed the measly remnants. 


It's such a shame because I have no idea what kind of pears they are but they are DElicious. Seeing the tree bare was like the part in A Christmas Story where the dogs eat their turkey. No canned pears, pear butter, apple and pear pie, pear tarts, pear sorbet. Gone. All gone! I just have to remember next year that when I see one ripening, it's time to pick the tree before nature gets to it. 

My dahlias are FINALLY starting to bloom. It's a direct result of mulching them last month. This summer was just too dry, the mulch kept them from drying out. I ordered almost 30 bulbs for every color and size and they should have bloomed last month. I'm really excited that they're doing so well now.  This one is called Walter Hardisty.


It's a "dinner plate" dahlia that will be 14-16 inches in diameter and look like this when it's done-
 

The best thing about dahlias is that one bulb grows into multiples by fall so every one plant I bought this year will be 3-4 plants next season. I'll be sure to take pictures as they bloom. I didn't plant any other flowers this year so I'm looking forward to these!

I'm about to plant my last crop before fall. Carrots, lettuces, broccolli, spinach and rutabaga all do well in the fall. I can't wait to plant garlic when it gets chilly. Each clove is a seed! All you do is plant the cloves pointy end up two inches down, cover them with leaves for overwintering and you'll have heads of garlic in the spring! 


SO easy! They can even grow in containers yet 78% of garlic in grocery stores is from China, insane. When they all pop up you harvest them, the outer skin will dry a bit, then keep them in a cool place and use them all year!  

Here's a picture of bunches at someone's farm-


Another cool thing I learned recently is about green onions. I'm about to plant green onions and scallions but an easy trick to staying stocked is to not throw away the root of a green onion after you use it. Instead, put it in a little water and watch a whole new scallion grow. Change the water like you would flowers and in a few days you'll have more! Each root will do this 3-4 times. 


I'm ending this post with a pretty sunset picture. There's no commentary about house progress because we're still painting. Still.